Definition of Done
What makes a photo done?
Taking a picture is a lengthy process - it starts with an idea and ends with a finished photograph that matches the expectations of the picture taker. A rather important question to ask is - when does that happen? When is the picture truly done?
Definition of Done is a term from software engineering. In a development process it defines conditions that must be met in order for an item to be done. I think that reasoning can be also applied to photography. You can rephrase it as when do I stop?
So let's dive in to the topic. The definition of done contains a few items, you can think of it as a checklist. It starts way before the frame is taken - when you begin preparations to the photo shoot. Photo sessions that I shoot typically start with a list of poses I am interested in trying out. That list can be full of verbal descriptions, detailing the pose, lightning, clothes, etc. There can be a reference photo from the internet. Or a word or two about the expected outcome.
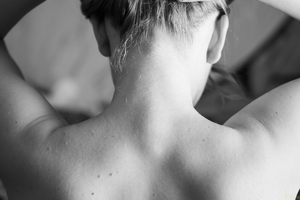
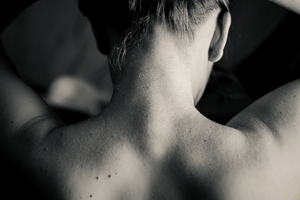
For this particular shot the description was quite verbose - I wanted a shot of upper part of the back, site-lit, with no hair disturbing the view. All this to highlight the shapes and shadows caused by muscles and bone structure.
The first element in the checklist was easy to do - the captured frame very closely resembles my initial idea. Tight framing adds intimacy to the picture, and everything else is there.
While I like the original colours of the skin, I think the photo benefits a lot from conversion to black and white. It pulls the focus out of the person and moves it directly to the light and dark areas caused by the light.
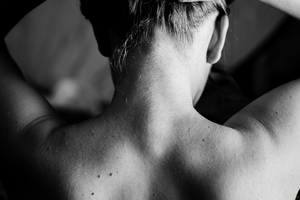
That makes the image tick all the boxes in the definition of done. Or at least so it seems. The resulting image is flat, there is not enough contrast. The shadow play can be made more apparent.
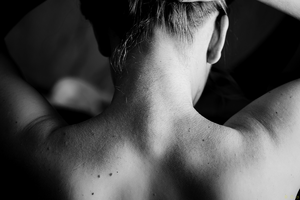
The conversion to black and white can be done for each colour separately (or in other words, each colour can contribute more towards black or white in the resulting image). Compare the image with its coloured version (straight from the camera) - certain areas are almost mono-coloured and can safely be turned much darker.
This next (shown below) step has all the dials turned to 11. Well, almost ;) This is at the edge of acceptance, but on the good side. Anything over it and the picture looks bizarre. But the way it looks now - it is impossible to tell what colours the original image had without seeing it first.
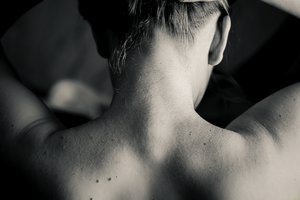
The final step of editing is slight sepia tone added to both shadows and highlights. For some reason it makes the image softer and more pleasant to look at. I believe it has something to do with the historical use of sepia, but I might be wrong.
So, was the photo done? Yes.
Or rather, it was until I decided to use it as an example. Then I noticed a slightly disturbing mistake and the more I looked at the photo, the more it hunt me.
No, I am not telling what it is. But you can examine the final final version and the one just before it. It will be obvious once you spot it.
And that was a valuable lesson for me: the definition of done helps in getting the picture all the way from setting up the shot to finishing editing, but it does not prevent anyone from making mistakes.
